How To Distribute WiFi Profiles to non managed devices with EZRADIUS
How to Distribute WiFi Profiles to non managed devices with EZRADIUS
While the easiest and best way to distribute WiFi profiles to managed devices is through an MDM, there are times when you need to distribute profiles to non-managed devices. EZRADIUS allows you to distribute EAP-TLS (Certificate based) and EAP-TTLS (Username and password usually Entra ID) profiles to non-managed devices to allow passwordless network certificate authentication without the need of an MDM.
To enable this feature you will have to create a new WiFi profile in EZRADIUS and then you can automatically email your users the new profile for their devices, or the users can download the profile from the EZRADIUS portal. To get started we are first going to create a new WiFi profile.
Prerequisites
- You must have an EZRADIUS account. If you do not have an account you can create an EZRADIUS instance.
- You must have a RADIUS policy created. If you do not have a RADIUS policy you can create a RADIUS policy.
- If you are using EAP-TLS you must have an EZCA instance. If you do not have an EZCA instance you can create an EZCA instance and have a self service certificate profile enabled
How to Create EAP-TLS Wifi Profiles without Intune - Video Tutorial
How to Create a new WiFi Profile for non-managed devices
- Log into the EZRADIUS portal using a network administrator or owner account account.
- Click on the
Manage WiFi Profilestab on the left side of the screen.
- Enter the profile name (this name will be seen by the users if you have multiple profiles, make sure it is descriptive such as
Guest WiFiorCorporate WiFi) - Select the RADIUS policy you want to use for this profile.

Network Details
- Enter the SSID of the network you want to connect to (Case Sensitive).
- Enter the security type of the network (WPA2 or WPA3).
- Select whether you want to use EAP-TLS or EAP-TTLS learn more about the difference between eap-tls vs eap-ttls.
- If you are using EAP-TTLS you can skip to the “Assignment” section.
- If you are using EAP-TLS, You will need to select your EZCA Instance URL. This will load the CAs available in your EZCA instance.
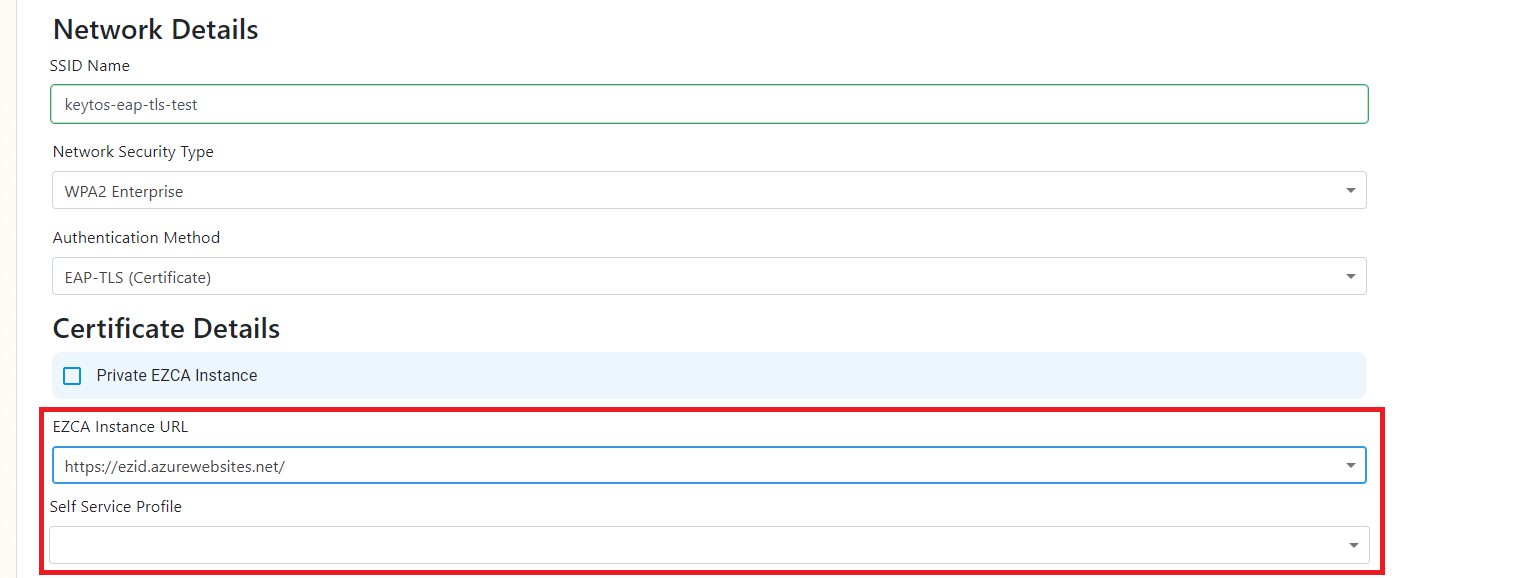
- Then you will need to select the self-service certificate profile you want to use for this profile. If you do not have a self-service certificate profile enabled you can enable it here.
Assignment
Now that we have added all the network details we can assign the profile to the whole Entra ID directory or to specific users or groups.
- If you would like all the users in your Entra ID directory to have access to this profile you can select the
All Tenant Usersoption. - If you would like to assign the profile to specific users or groups unchecked the
All Tenant Usersoption and select the users or groups you would like to assign the profile to.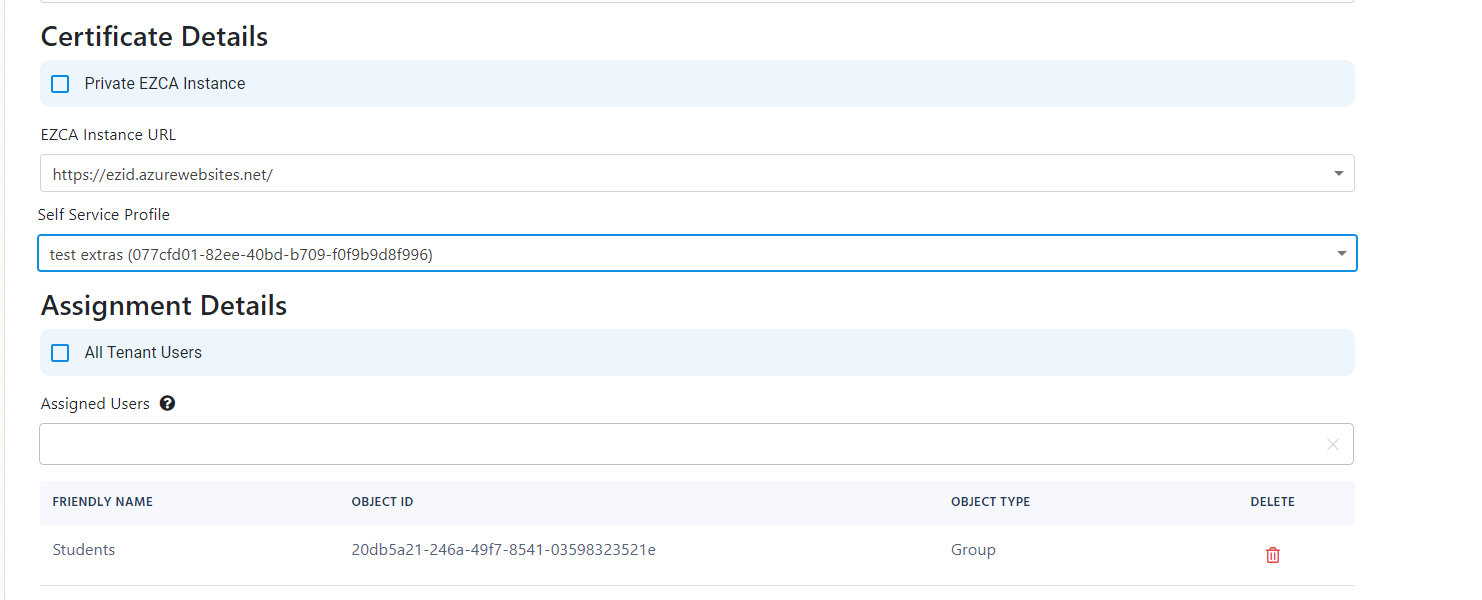
- Click the ‘Create Wi-Fi Profile’ button on the top right to create the profile.
